Now that cold times have arrived, it’s the perfect moment to knit a blanket made up of Granny Squares, like our Walnut Blanket, which will protect you and fend off the cold.
There are lots of different varieties of granny squares that you can choose to create and the color combinations are infinite!
But whatever style and color you choose, at one point the moment will inevitably come: the moment to connect each and every granny square with the others.
There are a lot of different ways to join our little squares and make a pretty blanket, but today we are going to show you the easiest way of all.
Joining Granny Squares with an invisible seam
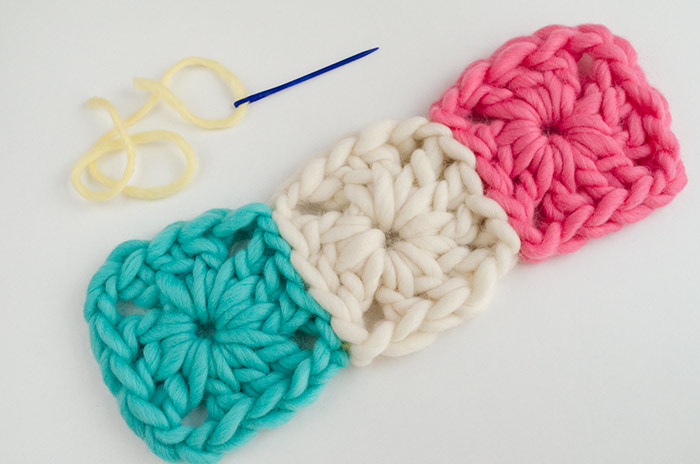
1. We are going to place all our granny squares flat out in front of us, outside facing out (this is really important).

2. Thread a knitter’s sewing needle with a thread that is finer than the one you used for knitting, don’t tie a knot.

3. Then look for the first horizontal thread inside the chain at the lower end of the right-hand granny square. Look closely at this picture.

4. For the tutorial we have used a thread of fine wool in a contrast color so that you can follow every step, but you should use a thread that has a color similar to the one of your squares, even though the seam is not going to be visible in the end.

5. Now, we are going to look for the same thread in the left-hand granny.
Make sure to insert the needle into the first stitch of the lower corner, that way they will look the same.

6. Once you are done with these steps, place the squares on a flat surface side by side and then continue working there.

7. Again, look for the horizontal thread in the square on the right, always in the upward direction.
Insert the needle through it.. Don’t tighten the thread with which you are sewing the squares.

8. Then do the same wit the square on the left. The idea is to always work with one granny and then with the other, so that they are exactly symmetrical.


9. Repeat the previous steps along the whole side of the granny squares, until you get to the upper part and there are no more stitches to join.
Do they look like they do in the picture above?
And now comes the magic and fun part of this technique!
10. Once we have joined all the stitches of each granny, we pull on both threads, carefully, step by step. ¡The squares will be held together, connected by an invisible seam!


Use this method for all the granny squares of your blanket, you can even join various squares at the same time to speed up the process, all you have to do is repeat the steps shown in this post.
And now you’re done with your granny square blanket to protect you from winter and to snuggle into when you watch a movie on lazy Sunday afternoons.
We really like knitting these blankets with thick wool because that makes them more comfy. What material do you prefer? Or do you also prefer wool?
Tell us about your experience and share pictures of your projects.
If you upload them to Instagram using the hashtag #WeAreKnitters you have the chance to win WAK products worth 70€ each month 🙂


18 comments
How do you make the squares please
Thank you
Hi Joan!
If you follow the instructions here: http://www.weareknitters.com/blog/type-stitches/basic-granny-square/, you should be able to make them! If you need more help, send an email to: [email protected]
Thank you! Enjoy 🙂
Do you have a pattern to purchase for these exact squares? If you wanted to buy yarn and a hook for these squares can you indicate size and amount for a blanket? When I observed the link you attached the squares looked different than those above in blue, pink and cream.
Hi Shelley,
Everything you need can be found here: http://www.weareknitters.es/kits-crochet/decoracion/walnut-blanket
Thank you!
-Francesca and the WAK team
What do you do with the ends of the yarn you use to join them?
At the end of your project you have to weave them in between the stitches and then cut the yarn. If you have any more questions, you can send them to [email protected] for a faster reply 🙂
I have done this using ribbon and pulled the ribbons to the front to make bows where there were 4 squares meeting together. The “edge” squares I crocheted over when doing the border. It was a really cute idea. To keep the bows from coming undone I stitched the knot of the bow with invisible thread (which, by the way, is a pain to work with).
but so pretty!! that sounds beautiful 🙂
Can you please tell me what kind of yarn you used here? It looks so squishy and soft!
hi! it is this one: http://www.weareknitters.com/knitting-needles-balls/knitting-wool
thanks for writing 🙂
The wool. Best regards!
Hello. What yarn did you use in the above? I love the texture of it.
Hi Jessi!!
For these squares we have used The Wool, here you can find many colors!
What size hook did you use to achieve this chunky look xxx
Hi Sophie!
For this thickness we recommend to use our 15mm crochet hook, but you can also do it with 10mm hooks and bigger!
15 mm. Have a nice day!
How do you secure the seam ???
You have to tight a knot and weave the ends in. Have a nice day!