Today we are going with a post of an essential technique in the arsenal of any self-respecting knitter. Surely at some point when you bound off a knitted garment the neck came out too tight, or the bottom hem didn’t give enough to fit comfortably and it bothers you when you put on your new favorite sweater. That’s because you didn’t use an elastic bind off, which has more give and makes the cuffs of the garment more comfortable. We are going to teach you how to do it.

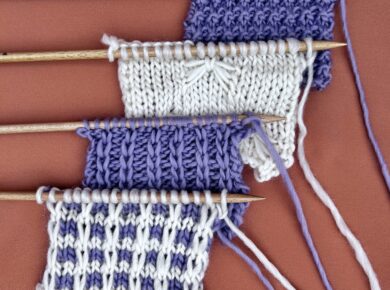
To show you how to knit this type of bind off we used a skein of our Twist and Shout yarn and size 8 (5 mm) beechwood needles.

For this step-by-step tutorial we are going to start with swatch that has knit and purl stitches.
The process is as follows:
To start the row:
- Work the first 2 stitches as they appear, in other words, knit them if they are knit stitches, purl them if they are purl stitches.
- Insert the left needle through the 2 stitches that you worked in the first step and then work them together the same way you worked the last stitch *. This means: if you knit the last stitch, then knit them together, if you purled the last stitch, purl them together. At the end of this step, you will have 1 stitch left on your right-hand needle.
* NOTE: when you insert the left needle and work the stitches together, you should place the needle in the right place to knit or purl them together. If you are going to knit you should have the left-hand needle in front of the stitches, and if you are going to purl you should have the needle behind the stitches.
Continue binding off the remaining stitches:
- Work the next stitch as it appears (you will have 2 stitches on your right needle).
- Insert the left needle through the 2 stitches on your right needle and work them together the same as you did the last stitch (you will have 1 stitch on your right needle). The same as you did for step 2 above.
- Repeat steps 3 and 4 until there is only 1 stitch left on your right-hand needle. Cut the working yarn long enough to weave in later, and using a tapestry needle pass the yarn through the last stitch and pull gently. Your bind off is finished!

As you can see in the photo above the bind off edge is much looser and allows the fabric to adapt easily.
We hope that you find this technique useful for your future projects. It is a great tip to keep in mind when garments are bound off at the neck or the bottom ribbing. We love to see your projects through social networks, where you can share them with us using the hashtag #weareknitters.