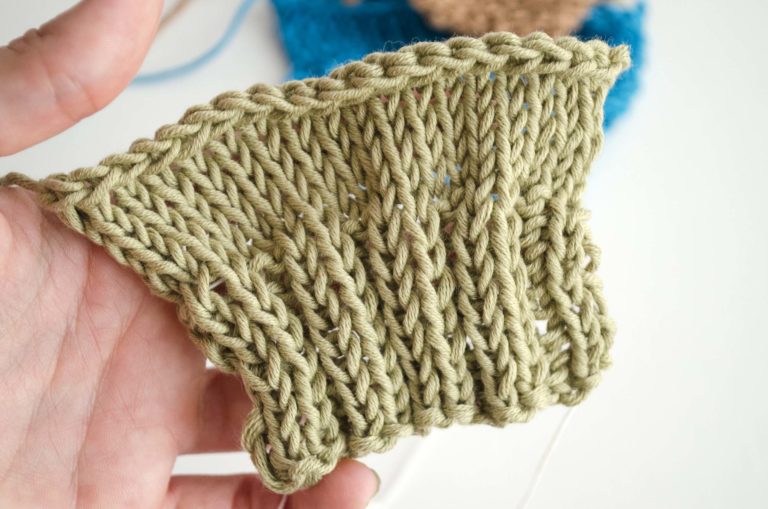
If you are getting tired of always beginning your projects and casting on the stitches in the same fashion, you are going to love this trick. Did you ever think about adding a rim with frills to your projects? It’s a very creative way to give your clothes a slightly different touch and make your borders more interesting!

But we know that the thing we hate the most is finishing knitting and then having to add a rim. Returning to your needles or hooks, taking up stitches, what a pain! With this technique we can directly start to take up stitches and make the frills at the same time, it couldn’t possibly be any easier!

Using your preferred method, cast on 4 stitches onto one of your wooden needles.

Now with the tip of your left-hand needle, pull the second stitch over the first, then the third over the first and finally pull the fourth over the first stitch. You now have only one stitch on your right-hand needle.

Cast on another stitch in front of the one that you already have.

Cast on 4 stitches and repeat the steps from before in order to make a new frill.

Don’t forget to cast on 1 stitch after every frill. They should look more or less like the ones in the picture above.

Continue in the same fashion until you have all the stitches necessary to start knitting.
As you can see it is really very easy to start directly with the rim already finished. You only have to take into account that with the stitches already taken up beforehand, you will use more yarn than the normal method, but it makes up for that by how pretty it looks on the finished products. And one more secret: The rim with frills comes in handy in all projects knitted in stockinette stitch because it prevents the rims from rolling up 🙂
Ready to start? Which color will you choose? We used the cotton in beige and 5MM wooden knitting needles in our example, but we love to see your versions! Share on Instagram with the hashtag #weareknitters!


16 comments
What bind off could you use to make a frill similar to this?
Hi Kitty,
Sorry, we only have the cast on method with frills right now!
Best,
WAK
That was the first thing I thought, too! Great minds, eh?
I also want a beautiful frilly cast off. Please!
Hi there!
You can try the picot bindoff, it will give you a similar look!
Best,
WAK
Is there a way to cast off so you have the same on both edges?
Hi Sandi,
Unfortunately we only have the steps to cast on with the frilled edge!
Best,
WAK
Would this picot bind off work?
https://m.youtube.com/watch?v=5JnrWVv0bUI
Try a picot bindoff and see how you like it. You can find videos on Youtube. iknitwithcatfur shows how to do it.
regarding the filly cast on Love it BUT
Can you help with: how you would bind off so your ends match when using this cast on?
Thanks
Kathy
I asked the question before reading all the requests.
My thought would be one row before the bind off you would be adding a multiple of stitches repeat the cast on
as each set of stitches is made bind them off to the end of the row.
Any thoughts?
Hi Kathy,
Give it a try! The picot bind off is a good option as well. We would love to see the finished product, so don’t forget to share it with us 🙂
Love this cast on tried it already, it’s great. Thank you!
Great!! Happy knitting!!
I first read about and saw how to do this on about.com but they missed explaining one part & I just couldn’t get it. I found this post & tada ? I figured it out!! It’s such a beautiful way to cast on & my first attempt in years at trying anything more complicated than the basic stitches! Thank you for the detailed pictures & explanation. As I’m getting compliments on my project on Twitter, I’m sharing this link to my 1,000 followers! Keep up the great work & I look forward to exploring your site some more! ~Michele Kelsey (theflirtyknitter)
Yay!!! Glad our posts help you and thank you for sharing!!! 😀 Happy knitting!