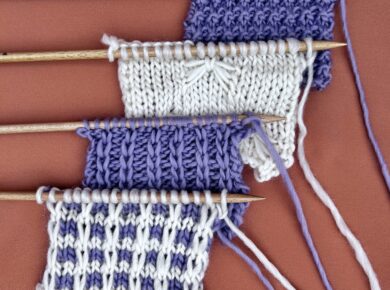
We love to create new textures with fibers, it’s one of our weaknesses and in today’s post we will teach you how to work the padded stitch. It has an amazing structure created by the crossed strands, and it would be perfect as a home decor item, like a blanket or cushions, don’t you think?

For this tutorial we used one of our Merifine skeins in a soft and summery color, and our size US 8 (5 mm) beechwood knitting needles.
Before we begin, here’s a short list of the basic techniques we will use to work this stitch:
Let’s begin!

We start by casting on a number of stitches multiple of 6 + 3.

Row 1: purl all stitches.

Row 2: start by knitting 2 stitches, *place the strand in front of the work and continue by slipping 5 stitches from the left to the right-hand needle, as if you were to purl them, knit 1*. Repeat from * to * until there is only 1 stitch left on the left-hand needle and knit it.
It’s likely you have doubts about slipping the stitches from one needle to the other, so we have made a short video for you:
Remember not to pull the strand too much when you move it from the front of the work to the back to knit the stitch. If you place correctly the 5 stitches you just slipped on the needle, sort of calculating the space (as you can see in the video), the fabric will be just perfect and will have no wrinkles.

Row 3: purl all stitches.

Row 4: start by knitting 4 stitches, *insert the right-hand needle under the strand, and knit it together with the next stitch, knit 5*. Repeat from * to * until there are 4 stitches left on your left-hand needle, which you will work as follows: insert the right-hand needle under the strand, and knit it together with the next stitch, knit 3.
If you are not sure how to knit the strand together with the stitch, here you have a mini video explaining how to work this part:

Row 5: purl all stitches

Row 6: knit 1, slip 3 stitches from the left to the right-hand needle as if you were going to purl them and with the yarn in front of the work, *continue by knitting 1 stitch, and slipping the next 5 stitches from the left to the right-hand needle as if you were going to purl them*. Repeat from * to * until there are 5 stitches left on the left-hand needle: knit 1, slip the next 3 stitches as if you were going to purl them and with the yarn in front of the work, and knit the last stitch.

Row 7: purl all stitches.

Row 8: knit 1, *insert the right-hand needle under the strand, and knit it together with the next stitch, knit 5*. Repeat from * to * until there are 2 stitches left on your left-hand needle, which you will work as follows: insert the right-hand needle under the strand, and knit it together with the next stitch, knit 1.

To continue working the stitch pattern, repeat rows 1 to 8.
As always, we hope you liked this tutorial and we would love to see in what projects you use this new stitch pattern. Don’t forget to share your pictures in social media with the hashtag #weareknitters. Until next time!