The intarsia technique is one of the most dreaded for knitters. Making the change between skeins correctly is the most important thing when we knit intarsia because the stability of the whole project will depend on how we change colors between each section.
Although at first glance we find it quite complicated, making these color changes correctly is very easy once we’ve memorized the steps to follow. We’ve prepared this video so that you have no doubt about how to do it:
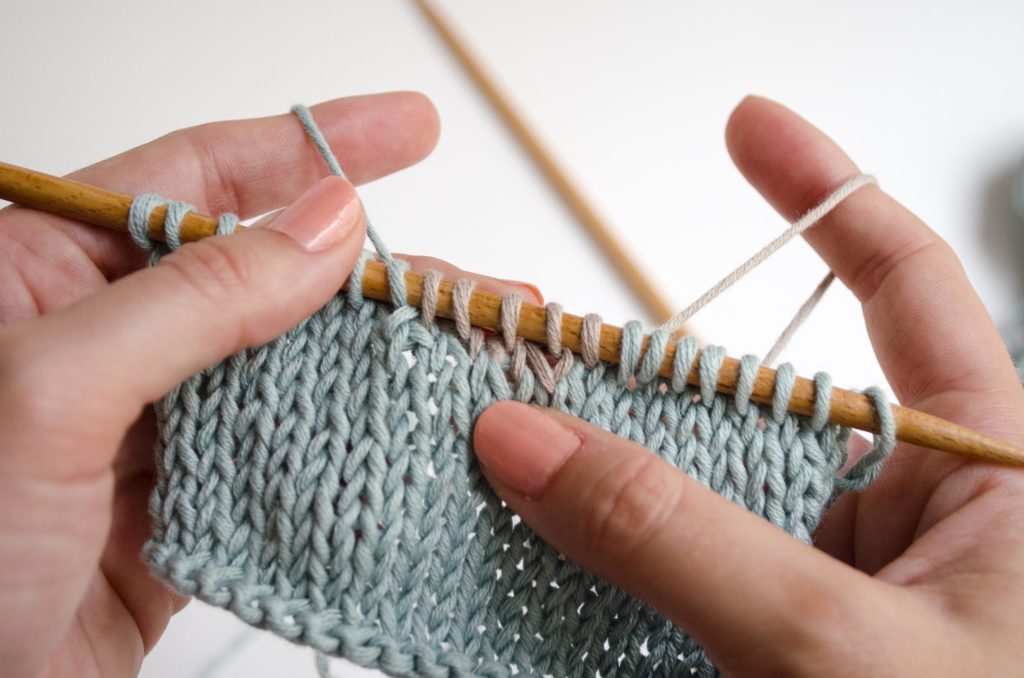
1.Work with the main base color until you want to make the first stitch in the new color. Drop the thread behind the work and insert the right needle into the next stitch.
2.Begin working with the new color and knit the next stitch with it.
3.Now leave the new color behind the work and pass the strand of the previous color on top of the strand of the new color.
4.Continue working with the new color as indicated in the diagram.
Repeat this same process each time that you want to change one strand of yarn for another.
Remember that before beginning to work intarsia you need to prepare your yarn and make much smaller skeins of each color to work on the sections of the chart you’re following. With this technique, we have to use a new strand of yarn each time we change color, rather than carrying the same thread along the back of the work as we would with Jacquard.
For this tutorial, we’ve used our Pima cotton, since it is perfect for getting defined images, but you can use the yarn that you like best.
Check out other related tutorials with intarsia on our blog and don’t forget to share your projects on social media using the hashtag #weareknitters. We’d love to see them!


