Not so long ago we taught you how to hem your knitted WAK garments and today we want to teach you a slightly different method, and so round up the lessons on hemming knitted garments, so you can apply them wherever you want or need to!
This kind of hem is ideal for top-down sweaters, and also for sleeves worked on the same way. It’s different from the former method we taught you in that it is worked with live stitches from the needle, without casting them off, so we can’t keep working once the hem is formed (as a cast off). That’s why we can only use them in the bottom, or edges, of our projects. Besides, if you know how to work the kitchener stitch, it will be easy for you to learn this method, since they are very similar.
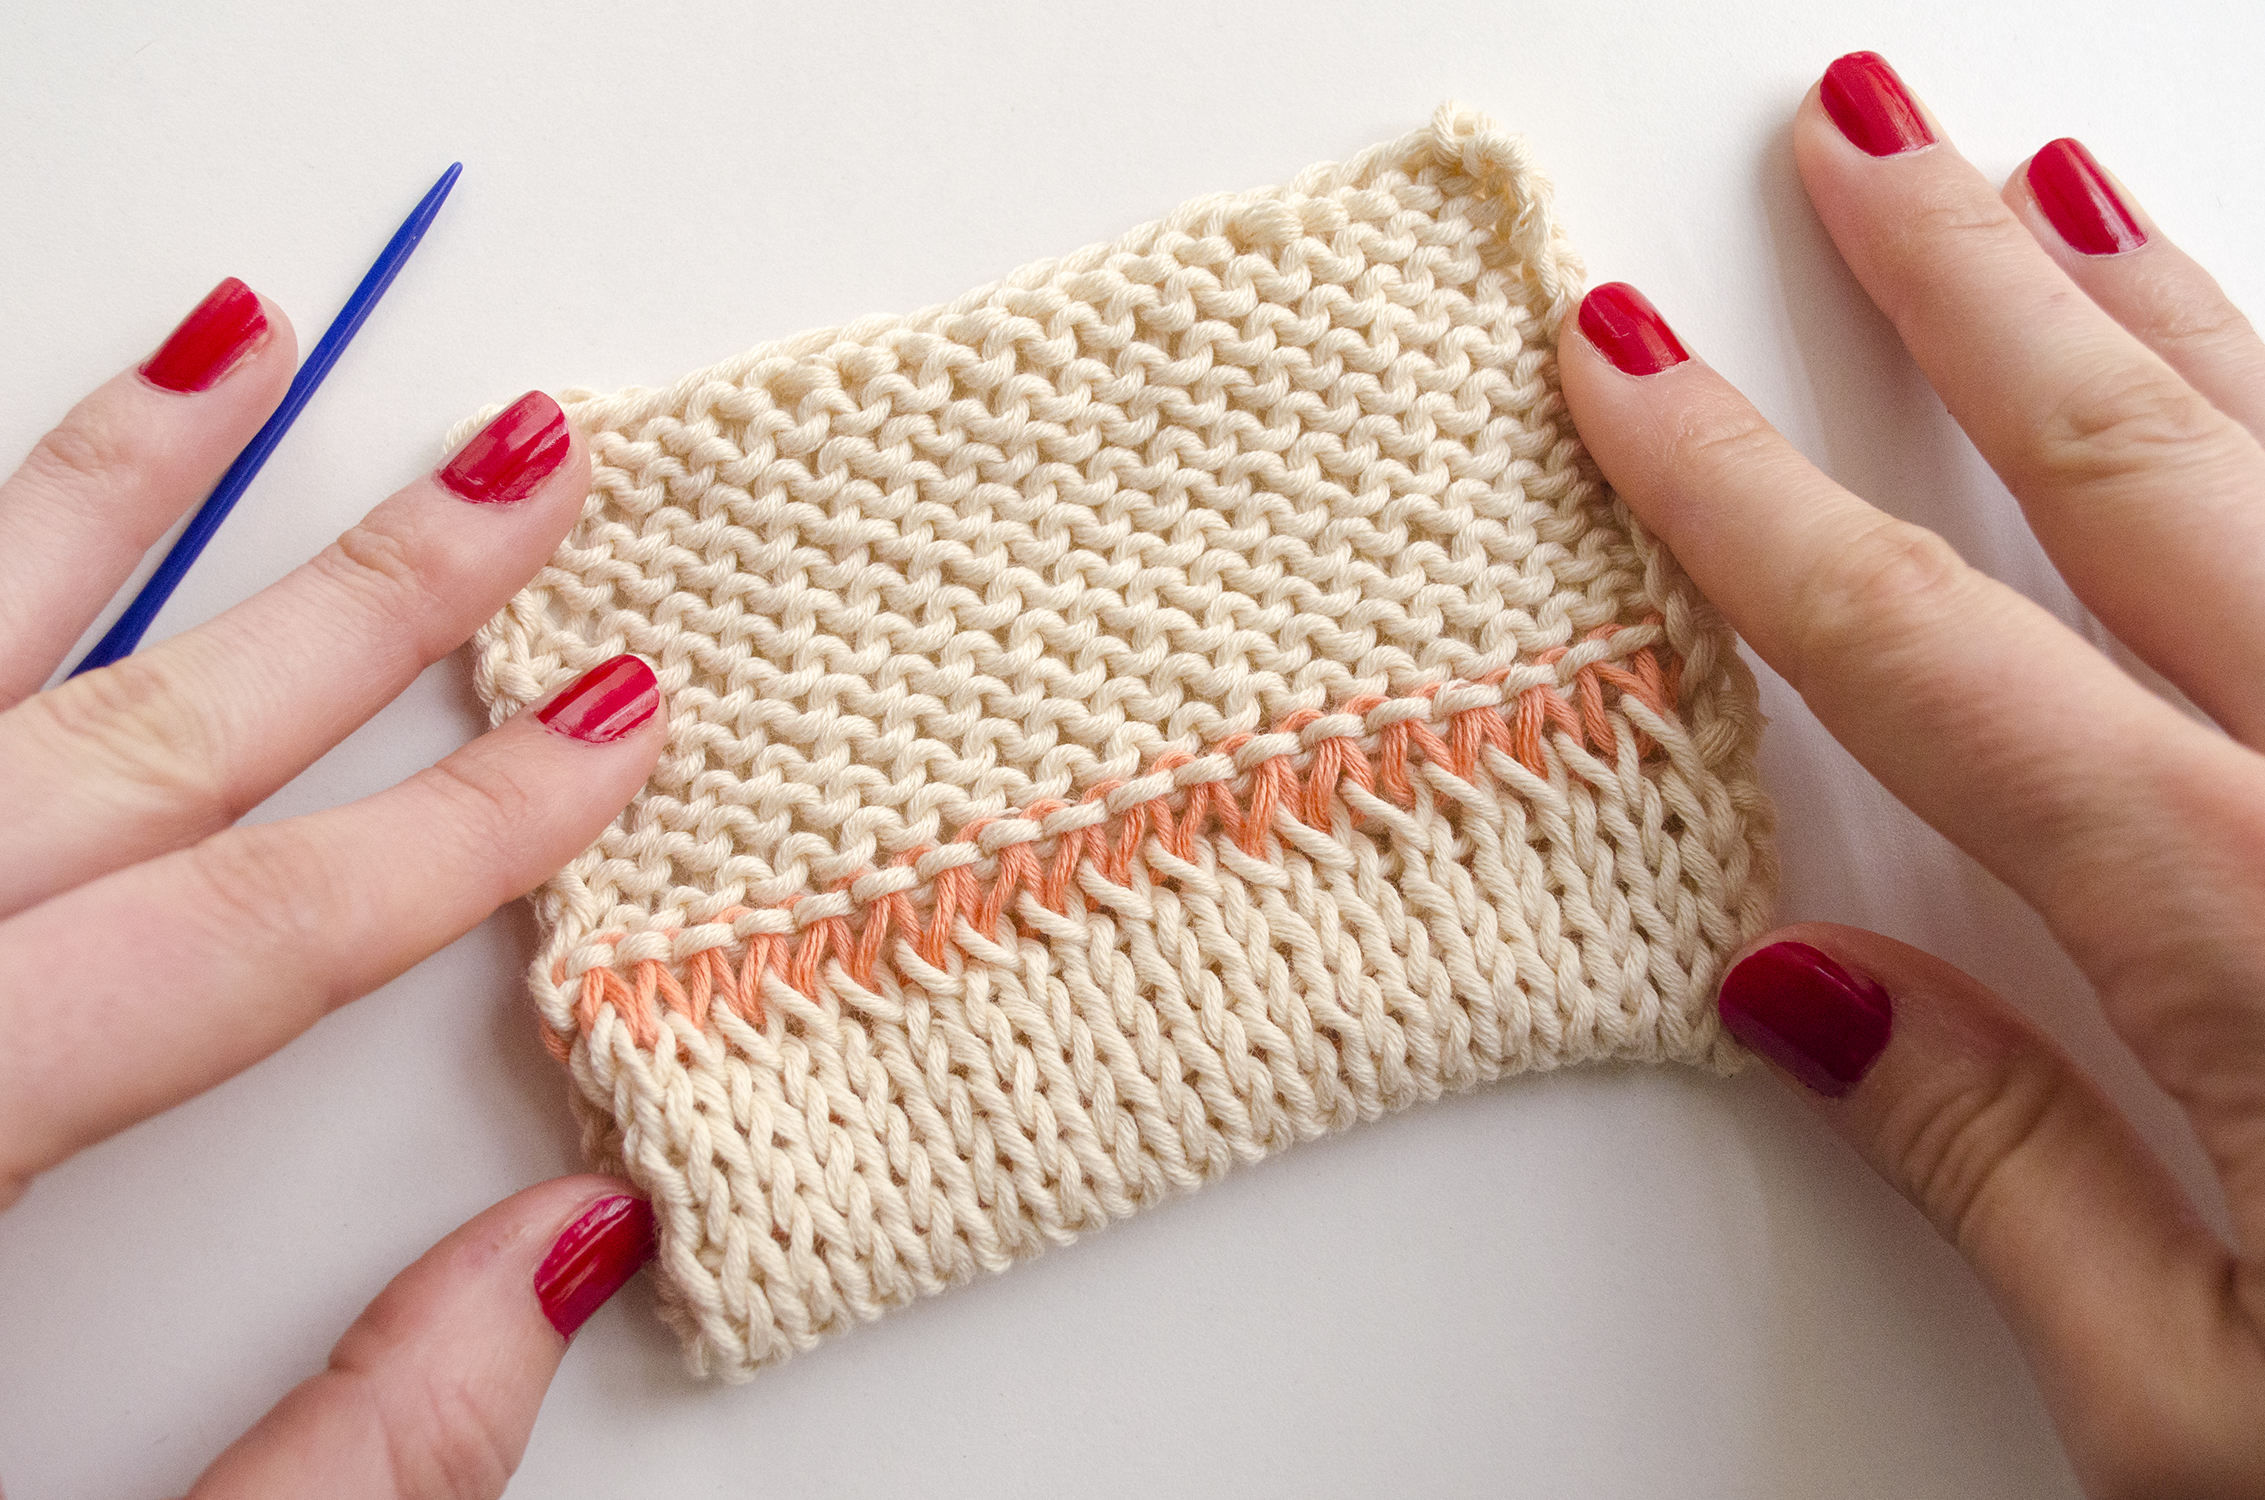
In order for you to clearly see the instructions we have used a contrasted color, but you can use the same working yarn so the union won’t show.
Place the project with the wrong side facing you, and fold it to you until you have the desired hem length. Now you can start joining the stitches on the needle with the row of stitches on the wrong side:
- Insert the tapestry needle through the first stitch on the wooden needle, back to front. Let the stitch on the wooden needle off the needle.
- Now pass the tapestry needle through the purled stitch bottom to top, this is, on the opposite direction to you. Be careful and only use half the row of stitches, the one farther away from you (check is out on the video).
- Insert the tapestry needle through the next purled stitch, this time top to bottom, contrary to the last stitch.
- Insert the tapestry needle on the off stitch from the first step, now front to back.
- To finish, pass the tapestry needle on the next stitch on the wooden needle, like we did on step 1, back to front.
Repeat these steps until you have sewed all live stitches from your wooden needle. Then weave in loose ends with the help of the tapestry needle.
Now your hem is done and you only have to block the garment, and if you need to, apply a bit of heat so the hem is completely plain.
It’s a different way to finish the edge of your garments
For this example we have used our Pima Cotton in salmon, with bay Wood knitting needles size US 8 / 5mm / UK 6. Pick your favorite color and don’t stop knitting with our kits, personalize your garments and give them a unique touch.


